Recap on before we got started.

As always before you attempt a remodel of anything, HAVE A BUDGET! Our budget was $1200. It took us 6 months to save up, and definitely worth the wait. Better to wait, and have a plan, than go in debt from bad choices and rash actions. As always, our next step, after deciding a budget, make a list. A list of everything you need, plus a little wiggle room is always a good idea. (We needed it)
 Here is our make-shift kitchen for the 3 weeks of remodel. Isn't it cute?! I added the little bunny to make it more homey. :)
 Here he is! Hammer and crowbar in hand! I'm pretty sure he had way too much fun with the demolition part. He wouldn't let me do any of it. Except the clean up part. You know, he makes the mess, I clean it up. That's just the way it goes.
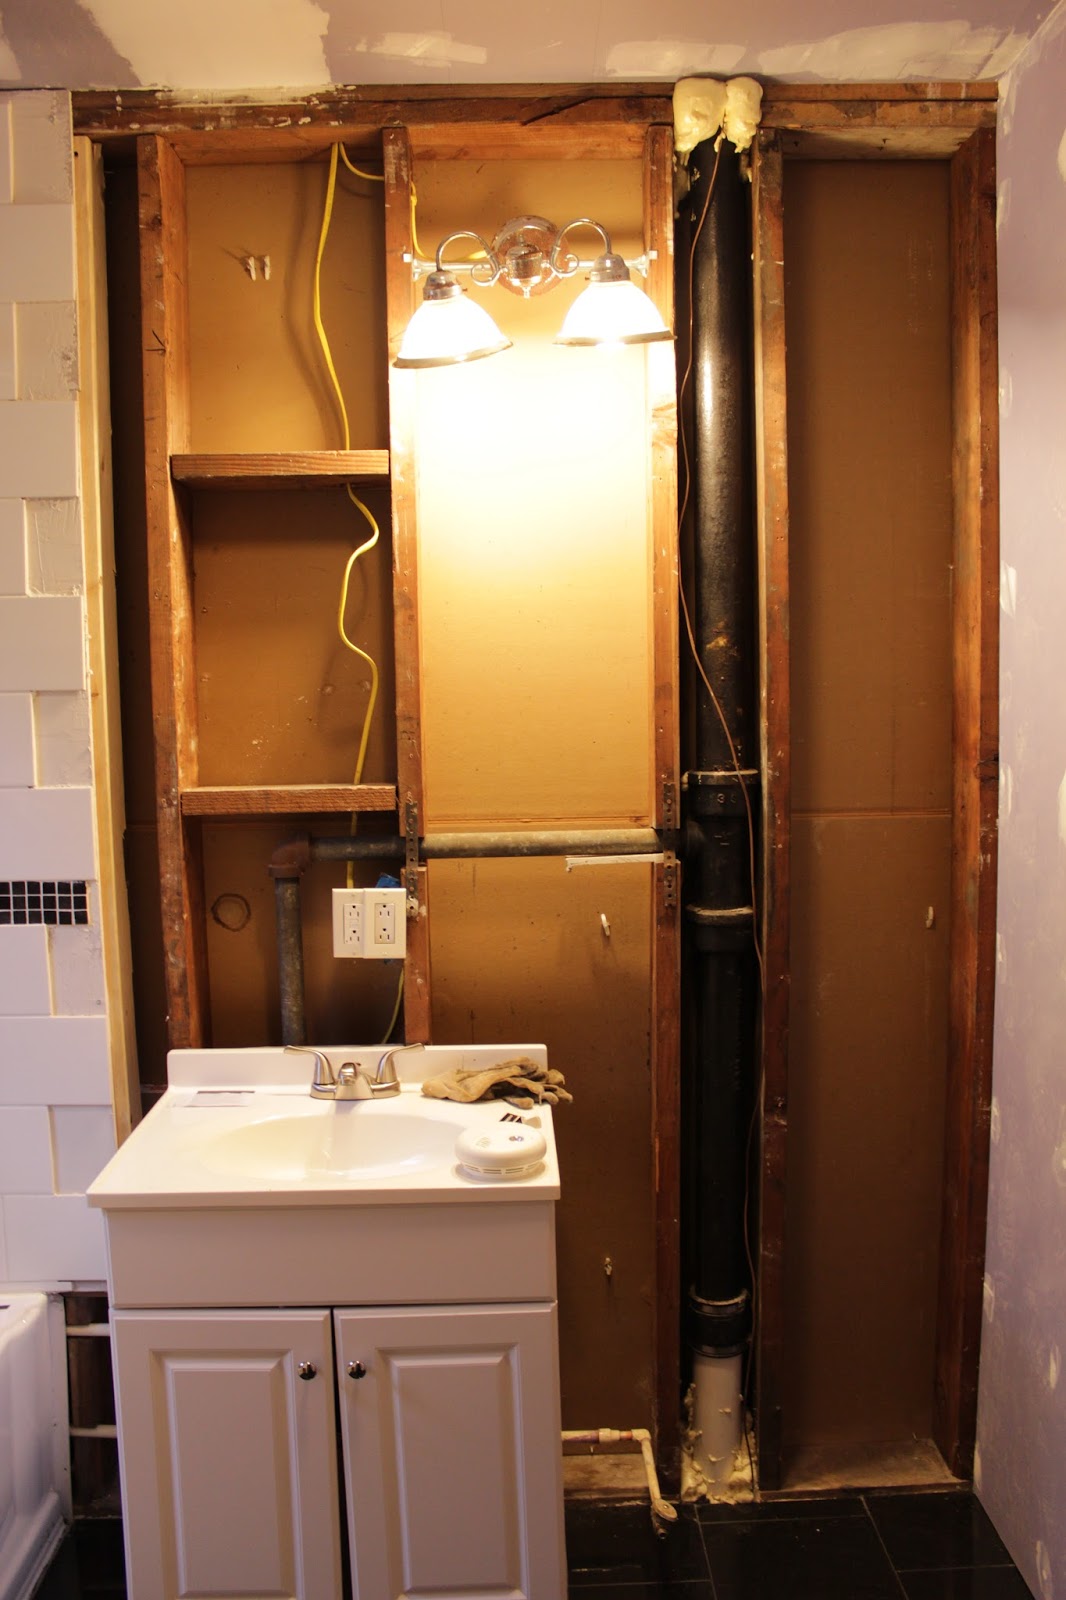
 And as with any remodel you will come upon some issues, especially in an older home. We did notice when we moved in that the sink cabinet was um... gross. It was due to water damage. This is why you need a little wiggle room in the budget. After taking out the cabinets, we started to take off the drywall. That is where we found the plumbing issue. The original 1950's steel vent pipe was rusted out, and was letting sewer gas into the house. Luckily, the plumbing was covered under home warranty. We just had to pay the warranty fee for a guy to come repair it. See here our pretty new PVC pipe.
  We also added some concrete board to help level out the floor and keep moisture from effecting the new cabinets, and we added a little bit of insulation, so that our pipes don't freeze. Remember how the dishwasher plugged into an outlet above the counter? Yeah, we put in a new outlet under the counter, where we plugged in the dishwasher and a garbage disposal. ($80) We also needed to add a switch for the disposal. Being a old house, the wires were kind of weird, and we did end up hiring an electrician to help us out. :/ Did not intend on doing that, but it needed to be done. ($100)
 Here is the baby cat, he likes to help out sometimes, or at least make sure we know what we are doing.
Before we started, we had so many different ideas on what to do with the cabinets. Did we want to paint all of them the same color? Two-tone, top one color, bottom another? Stain them all to match? We decided to stain them all the same color. Dark brown (Gallon of stain $30ish -Lowes) We didn't have a sander, but we budgeted to buy one. We got a Ryobi triangular sander. ($35) So, I got to sand down all the top cabinets. Through the millions of coats of paint to get to bare wood. (probably at least 4 coats of previous paint=PAIN!) We tested out the stain on the top cabinets. As you can see it's not brown. The stain looked so blotchy and bad. We, then, decided to go with the two-tone look. We got a gallon of this beautiful dark gray color. A gallon was way too much paint but, I like the color so much I can use it elsewhere.
We put up new mold resist drywall. (Same as the bathroom-free) You might be able to tell that a couple of the tiles fell off/broke when we took the counters off. (under the window) We didn't budget for new back splash, because we didn't think we would need it. You will see in another picture what we did with the back splash.

 Here is a closer look at the cabinets. They had this weird sticky liner in them that was that yucky green color that you see at the left. Bleh! I had to sand down the insides to get it all out. We then painted them white to brighten them up a bit. Much better.

 Next up shopping for cabinets! This was the fun part. I like the shopping parts. :) We already knew what we wanted, as we had been 'window shopping' for months. We went with the unfinished oak cabinets, so we could stain them ourselves. This was much cheaper than getting the already finished models. (They ranged from $100-$200 a piece) They have this nice free service where you can give them your dimensions and they will show you which sizes are needed. We even got a discount on one of the cabinets, because the back of it was chipped. BONUS! Who is gonna see the back of your cabinet? No one. Then we had the fun task of fitting them all in our minivan. Tetris anyone? We are Tetris experts!
We got them home, and I got the awesome job of staining. That is some stinky business. Make sure you have some ventilation. It reminds me of this time my friend, Candace and I, painted my living room without opening the windows. :) Oops.. we got a little loopy.

 Anyways... After the staining and the polyurethane-ing we got them inside and Aaron started on getting them level. I had to put a pretty hand towel on the oven to help it not look so chaotic. You might also notice the little yellow wire hanging out above the stove. Don't worry, it is not live. We were going to hard wire the vent hood into the outlet.

And here we are with all of the cabinets in, and the counters on! What a long and strange trip it's been. Notice the dishwasher. It's not in the middle of the floor anymore! The space where the dishwasher used to be had no flooring. :( This was about the end of our budget. We had already thought about redoing the flooring. But, we did not budget that for this remodel. So, we bandaged it. We got linoleum that matched size and shape. It was just a different color. It looks kinda dumb. But again, work in progress.
Here is the baby again. Checking out the work. I think he approves.
And then the water! The running water! Out of our brand new faucet ($80), into our brand new sink ($60). This was my favorite sound after those long three weeks. Glorious!

And for some reason I don't have a full picture of the finished kitchen, but I do have this. All the parts in one. The counter top, the cabinets, the uppers, and the back splash. The back splash is fasade thermoplastic. It is a plastic sheet that you can cut to size. All you have to do is get some heavy duty double stick tape and stick it up there. It is just a bandage, but looks really awesome. I believe our future plans will contain a new back splash.

Sneak peak! The baby checking out our new flooring!